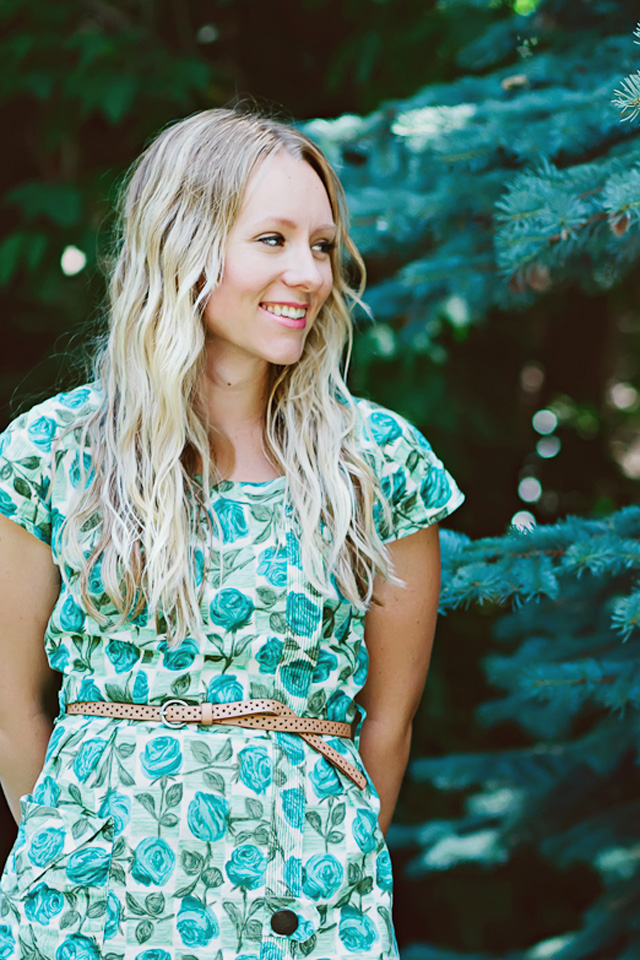
I was having a hard time finding a backpack that both the Little Miss and I liked for her to take to preschool this year, so I decided to try my hand at making one and ended up with a backpack we both LOVE! It makes me happy that I sent her off to school for the first time with something I put so much love and effort into, almost like a part of me went with her. This is her 'to school' backpack since she has never been before, but it could be your child's 'back to school' backpack - find out how to make your own using the tutorial below!
Supplies Needed:
1. Mix and match fabric (see pattern piece sizes and cut amounts below)
2. Thread to match
3. 1 1/2 yards bias tape
4. About 2 yards 1" wide polyester straps (length depends on how long you want the straps and handle)
5. A pair of magnetic snaps
6. Four 1" metal D-rings.
Notes on what materials I used: I used duck cloth for the main body of my bag (the oatmeal and yellow fabric), if you choose to use a lighter-weight fabric you may want to add interfacing - even mine would have benefited from it although it's fine. The geometric fabric I used on the flap is a vintage scrap I had on hand. Since it was a little bit see-through I backed it with a piece of duck cloth, otherwise you would have been able to see the magnetic snap backing through it. The bias tape is faux-leather. I bought all of the supplies (other than the geometric fabric) at Joann Fabrics.
1. Cut out pattern pieces in the fabric(s) of your choice.
- Cut four 13"x16" pieces. They will be the main body of the backpack, two for the outside and two for the lining. On my backpack they are the oatmeal-colored fabric.
- Cut three 13"x9" pieces. One of them will be the front pocket, on my backpack it is in yellow, and the other two will be the front and back of the flap, on my backpack they are in geometric print and yellow.
- Cut two 4"x5" pieces. These are the loops on either side to hold the D-rings. On my backpack they are in yellow.
- Cut one 9"x6 1/2" piece, or simply fold the 13"x9" piece in half. This is the inside pocket, and the size may be altered depending on how big or small you would like the pocket. On my backpack it is in yellow on the inside.
2. Sew bias along top of outer pocket piece. Baste sides and bottom to right-side of outer front piece.
3. Take the loop pieces and fold them in half to form a crease down the middle, open it up then fold each side to the middle crease, then fold entire piece in half so only the ends are raw edges. Top stitch around all four sides. Put two metal D-rings on each loop and baste ends together. Baste finished loops to front piece on top of the front pocket facing in as pictured, 4 inches up from the bottom.
4. Using a protractor, round the bottom edges of the two flap pieces 2" up and over.
6. Following the directions on the back of the magnetic snap packaging, insert the top half (or 'male' portion) where you would like them inside the flap, making sure they are on the bottom, or underside of the flap. Baste the top of the flap closed.
7. Baste handle and straps to the top of the right-side of the outer back piece. (Note: after I took these pictures I decided to move my straps in more as you may notice on the finished bag).
8. Using a 1/2" seam allowance, sew flap across the top of the outer back piece, right-sides together. Press seam up.
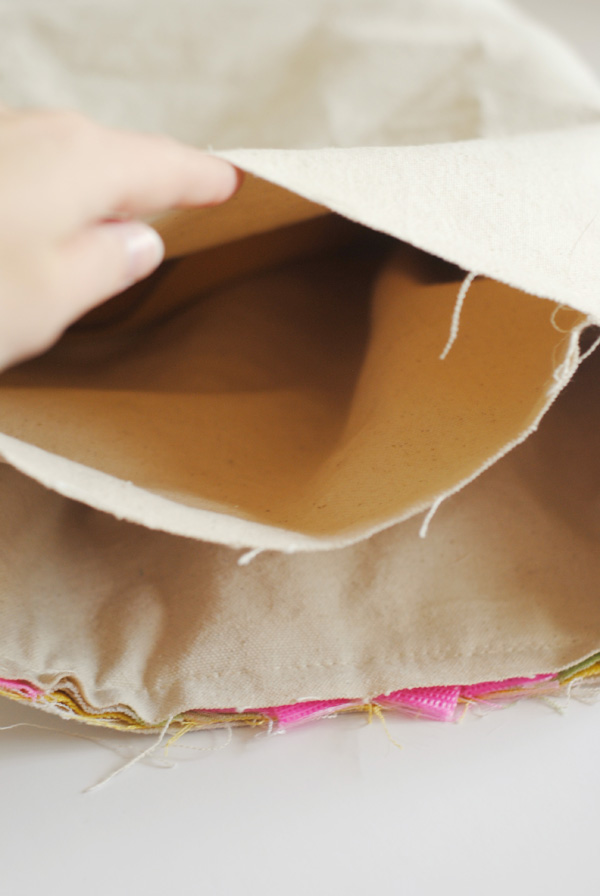
9. Using a 1/4" seam allowance, sew outer front and outer back pieces right-sides together around sides and bottom. Place the straps in the middle to avoid sewing them into the seams. Also make sure not to sew up onto the flap at the top of both sides - the front piece will be longer than the back piece at the top (see pictures), so you will be left with a little flap on front. Back-stitch when you go over the loops and bias of the front pocket to make them more secure. Flip bag right-side out and press all seams.
(Note: I changed my seam allowance to 1/4" after these pictures were taken in order to widen the bag, the pictures show a 1/2" seam allowance).
11. Add bias along the top of inside pocket. Iron the sides and bottom under. You can use a fabric pen and ruler to add lines for pockets, pencil slots, etc. as wanted. Sew onto right-side of back lining piece, back-stitching at the top of each line.
12. Using a 1/4" seam allowance, sew front and back lining pieces right-sides together. Turn right-side out, press seams.
13. Add 1 1/2" gussets to both outside bag and lining bag bottom corners. To do this turn the bags wrong-side out again, place your hand into the corner and flatten the corner into a triangle with the seam running down the middle. Using a ruler measure 1 1/2" from the point where the seams meet down each side and draw a line straight across. Sew along this line. Press seam. You may also tack them down if you'd like, but don't cut them off as they will help give shape and substance to the bottom of your backpack.
15. Pull the outer bag out of the lining bag through the opening, and then flip the lining bag right-side out. Stuff the lining bag into place inside the outer bag.
16. Press the top seam, and hand stitch opening closed. Remove any baste stitches that may be showing along the seams.
17. Last, hem strap ends to prevent fraying. Thread them through the D-rings, adjusting length to fit.
The finished backpack measures about 12" wide by15" tall and about 2 1/4" deep.


This is a REALLY cute backpack. I love the pencil holders on the inside and the big front pocket. Very cute.
ReplyDeleteThis so cute, you should sell these!
ReplyDeleteNice Stacy! Looks Awesome!
ReplyDeleteTHis is so so so so awesome Stacy. Great job.
ReplyDeleteSOOOO cute, Stacy! Seriously, your fabric choices are always spot on. SPOT ON, lady! Love it so much. Enjoy school, LM!
ReplyDeleteAdorable! So much love went into this creation:)
ReplyDeleteWow I really love this backpack. Thanks for such a detailed tutorial, would love to try this out. Hope LM is enjoying her preschool first few days. I'm sure she has the best bag hanging on the hooks!:)
ReplyDeleteWow, this backpack is absolutely beautiful !
ReplyDeleteoh goodness, what a fantastic tutorial!!! I sincerely hope you will consider uploading a photo of this into SewSet. SewSet is a new on-line sewing pattern & tutorial search engine - where users can see, search, save & sew the patterns they find. All you need to do is add a photo and brief description, and everything links directly back to you. This would be a fantastic addition to the directory!
ReplyDeleteThank you so much for sharing!
- Jess
MeSewCrazy.com
SewSet.com
Thank you for sharing this great tutorial! Looks fantastic.
ReplyDeleteLove this so much. Thanks for sharing how you did it. I love the colors and patterns of fabrics you chose. Wonderful!
ReplyDeleteSee, this is the kind of thing I make for my daughter in desperation, the night before school, and therefore never take the time to photograph anything. Beautifully done.
ReplyDeleteI love this a lot! Thanks for sharing! I'll have to make one!
ReplyDeletefantastic! thanks for the tutorial.
ReplyDeletethis is amazing!! did you know it says "turorial" instead of "tutorial" on the photo though?
ReplyDeleteoh gosh, how did i not catch that?! thanks for telling me, it's only the biggest word on the post... fixed! :)
DeleteThanx for this awesome tutorial! I truly lve it
ReplyDeleteThat's awesome. And the tutorial is very well done.
ReplyDeleteMy little girl just started preschool too and has "requested" a backpack of her own. So, THANKS! for just the tutorial I needed. :)
ReplyDeletegreat tutorial! thanks for posting
ReplyDeleteSew awesome!! Going to make this for my nieces birthday present.
ReplyDeleteSew awesome!! Going to make this for my nieces birthday present.
ReplyDeleteThank you for sharing. It's really awesome! God bless you!
ReplyDeleteThank you for sharing. It's really awesome! God bless you!
ReplyDeleteI am so happy I just found your tutorial! It looks phantastic and is just what I was looking for. Thank you so much for sharing!Greetings from Germany
ReplyDeleteBeautiful backpack!
ReplyDeletethanks for sharing, I know all the work it takes to make a tutorial. this is so awesome!
ReplyDeleteawesome, thanks for tutorial.
ReplyDeleteCute! I've entered it in our Bag Brag Tuedsay linking Party at ChrisW Designs! :) http://blog.chriswdesigns.com/linking-parties/
ReplyDeleteThank you so much for tutorial and it was easy to follow. I just made Star Trek backpack for my son and he wore it on his first day of kindergarten. My son loves his backpack! Wish I could post a picture here of Star Trek backpack I made.
ReplyDeleteThanks again!!! <3
Wow. I can't wait to try this. I'm looking to make a teenage to adult-sized backpack, but I like your children's backpack design so much I'm going to attempt enlarging it. I usually just enlarge all the measurements proportionally. Wish me luck because I need it! But I'm sure to have fun trying.
ReplyDeleteThis is great! I want to make myself a backpack for graduate school - by the look of the size of it on your little girl it looks like it would be fine for an adult! Perhaps more interfacing to hold a laptop though :) The colors you chose are adorable. - Bailey Marie & Me
ReplyDeleteThanks for sharing^^ Love your blog!
ReplyDeleteThis is cute Stacy! Do you know the finished dimensions?
ReplyDeleteThanks! The finished backpack measures about 12" wide by 15" tall and about 2 1/4" deep.
DeleteLovely tutorial, thanks for sharing. I'm in the middle of making one, doing a couple changes here and there, but keeping the basic pieces and dimensions. My sister-in-law has seven boys, and since she already had so much stuff, I ask her for practical ideas for her kids' birthdays. She requested a backpack for her youngest's 1st birthday, something he can grow into, and I looked up a whole bunch of ideas, finally settling on this one. I'm using repurposed denim for part of it, along with a couple boyish prints, some of which I'm using to make my own bias edging. I also found some pretty black metal hardware for the D-rings and snaps. Can't wait to see how it turns out!
ReplyDelete